"Master Visual Storytelling: Create Captivating Videos with Pictures Using AI Studios"
Picture this: in our digital world, the power of visual storytelling is simply undeniable, and creating a captivating video with pictures has never been more within reach! Did you know that videos are expected to make up 82% of all internet traffic by 2022? That's huge! With such a mind-blowing stat, there's no better time to jump into video creation. Are you a seasoned content creator or just a curious beginner? Either way, this guide is your ticket to crafting stunning videos that captivate and engage your audience.
We'll explore the best tools like Canva, Animoto, and AI Studios by Deepbrain AI, and dive into advanced storytelling techniques. Think of it like assembling a puzzle—each piece is crucial to the final picture. Get ready to unleash your creativity as we guide you step-by-step through making a video with pictures using AI Studios. Plus, we’ll share insider tips on optimizing your videos for SEO to ensure they reach the widest audience possible. So, let's kick off your journey to creating videos that not only tell your story but also leave a lasting impression!
Choosing the Right Tool for Creating a Video with Pictures
Overview of Popular Tools for Creating Videos with Pictures
- AI Studios by Deepbrain AI: Offers automated editing and voice synthesis, ideal for professional creators seeking advanced AI assistance.
- Canva: Known for its user-friendly drag-and-drop interface, Canva allows users to create polished videos from pictures without deep AI features.
- Animoto: Similar to Canva, Animoto provides easy-to-use templates for video creation, focusing on simplicity and quick results.
- Descript: Combines AI-enhanced video editing with voice synthesis, perfect for users wanting minimal manual editing.
- CapCut: A free app favored for social media content, offering features like background removal and auto-captioning.
Comparison of Features, Pros, and Cons
- AI Studios by Deepbrain AI:
- Pros: Advanced AI automation, professional video quality.
- Cons: May require a learning curve for beginners.
- Pros: Intuitive interface, vast template library.
- Cons: Lacks AI-driven features.
- Pros: Quick video assembly, beginner-friendly.
- Cons: Limited customization options.
- Pros: Automated editing, voice synthesis.
- Cons: More suited for professional use.
- Pros: Free, extensive features for social media.
- Cons: Only supports vertical formats, usability issues.
Recommendations Based on User Needs and Expertise Level
- Beginners/Social Media Creators: CapCut is recommended for its ease of use and free features.
- AI-Driven Video Generation: Hailuo AI or Runway Gen-3 Alpha Turbo are suitable for users interested in experimenting with AI.
- Professional Creators: Deepbrain AI Studios or Descript offer advanced features for polished, automated videos.
- Traditional Video Assembly: Canva and Animoto are best for straightforward video creation without AI complexity.

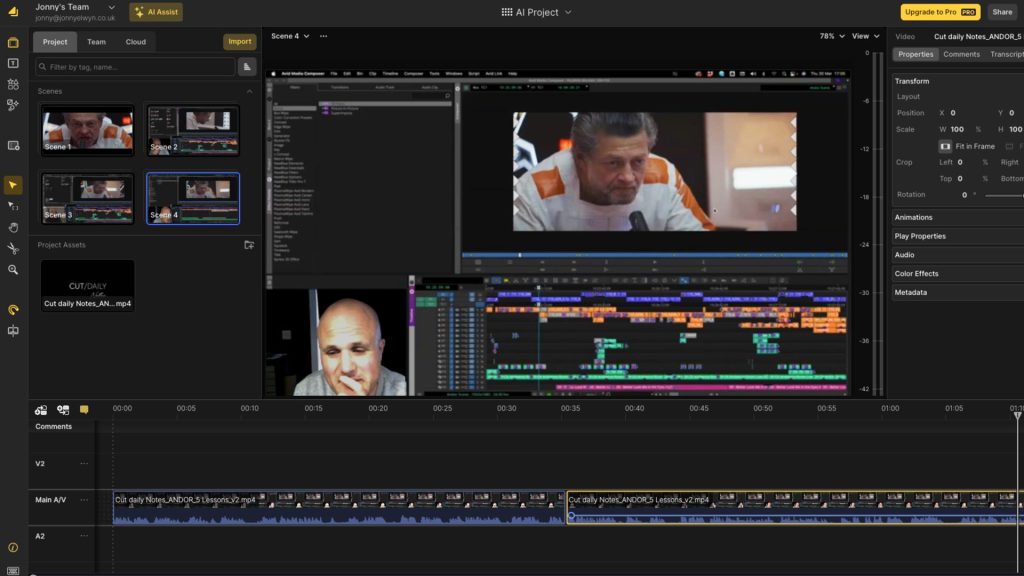
Step-by-Step Guide to Making a Video with Pictures Using AI Studios
Step 1: Sign up and log into AI Studios
To start creating a video with pictures using AI Studios, you first need to access the platform:
Navigate to the AI Studios Website: Open your preferred web browser and enter the URL for AI Studios. This will take you to the platform's homepage.
Create an Account:
- If you are a new user, look for the "Sign Up" button. Click on it to begin the registration process.
- Fill in the required fields such as your email address, password, and any other necessary information.
- Confirm your registration through a verification email sent to your email address.
Log In:
- If you already have an account, click on the "Log In" button.
- Enter your email address and password.
- Click "Submit" to access your account dashboard.
Step 2: Start a New Project
Once you are logged into AI Studios, you can begin creating your video project:
Create a New Project:
- On your dashboard, locate the "New Project" button. It is typically prominently displayed for easy access.
- Click on "New Project" to open the project creation menu.
Select Project Type:
- From the available options, choose "Video with Pictures." This option is specifically designed for creating videos using images.
- Confirm your selection to proceed to the project workspace.
Step 3: Upload Your Pictures
With your project setup, the next step is to upload the images you want to include in your video:
Select Images:
- Click on the "Upload" button, usually found in the project workspace.
- Browse your device to find the images you wish to include. You can select multiple images at once by holding down the 'Ctrl' (or 'Cmd' on Mac) key while clicking.
Upload Images:
- Once selected, click "Open" to upload the images to AI Studios.
- Wait for the upload process to complete. You will see thumbnails of your images in the project workspace once they are successfully uploaded.
Step 4: Arrange and Edit Your Pictures
Now that your images are uploaded, you can arrange and edit them to create a cohesive video:
Arrange Images:
- In the project workspace, you will see your uploaded images. Drag and drop them to rearrange the order according to your preference.
- Consider the narrative or flow you want your video to have when arranging your images.
Edit Images:
- Click on an image to access editing tools.
- Adjust Size and Orientation: Use the resize handles to change the image size. Rotate the image if necessary to achieve the desired orientation.
- Apply Filters: Enhance your images by applying filters. Choose from options such as sepia, black and white, or vibrant to match the mood of your video.
Step 5: Add Music and Transitions
To enhance the emotional and visual appeal of your video, add background music and transitions between images:
Add Music:
- Click on the "Music" tab in the project workspace.
- Browse AI Studios' music library to find a track that fits the theme of your video. Alternatively, you can upload your own audio file by clicking on the "Upload Music" button.
- Once selected, the music will automatically be added to your project timeline.
Apply Transitions:
- Go to the "Transitions" section.
- Choose from various transition effects such as fade, slide, or dissolve.
- Drag and drop the desired transition effect between each pair of images to ensure a smooth visual flow.
Step 6: Preview and Finalize Your Video
Before finalizing your video, it's crucial to preview it to ensure everything looks and sounds as intended:
Preview Video:
- Click on the "Preview" button to watch your video.
- Pay attention to the timing of images, the flow of transitions, and the synchronization of music.
Make Adjustments:
- If you notice any issues, such as images being too short or transitions not flowing smoothly, go back to the editing sections to make the necessary changes.
- Adjust the duration of images or transitions by clicking on them and setting the desired time.
Save Your Project:
- Once you are satisfied with the preview, click on the "Save" button to save your project.
- Choose a file name and location for your video. You may also select the video quality and format options available.
Additional Tips for Enhancing Video Quality and Engagement
- Consistency is Key: Maintain a consistent theme or style throughout your video to make it more professional and engaging.
- Use High-Quality Images: Ensure that the images you upload are of high resolution to avoid pixelation in the final video.
- Balance Music Volume: Make sure the background music is not overpowering. Adjust the volume to ensure it complements the visuals without distracting from them.
- Consider Text Overlays: Adding text overlays can help convey messages or highlight important points. Use them sparingly to avoid clutter.
- Test on Different Devices: Before finalizing, preview your video on different devices to ensure it looks good on both small and large screens.
- Export Settings: When saving your video, choose the appropriate export settings based on where you plan to share or display it. For example, use a higher resolution for large displays or online platforms that support HD content.
By following these steps and tips, you can create a visually appealing and engaging video using AI Studios, effectively showcasing your images in a dynamic format.
Advanced Techniques for Storytelling in Videos with Pictures
Using Narrative Structures to Create a Compelling Story
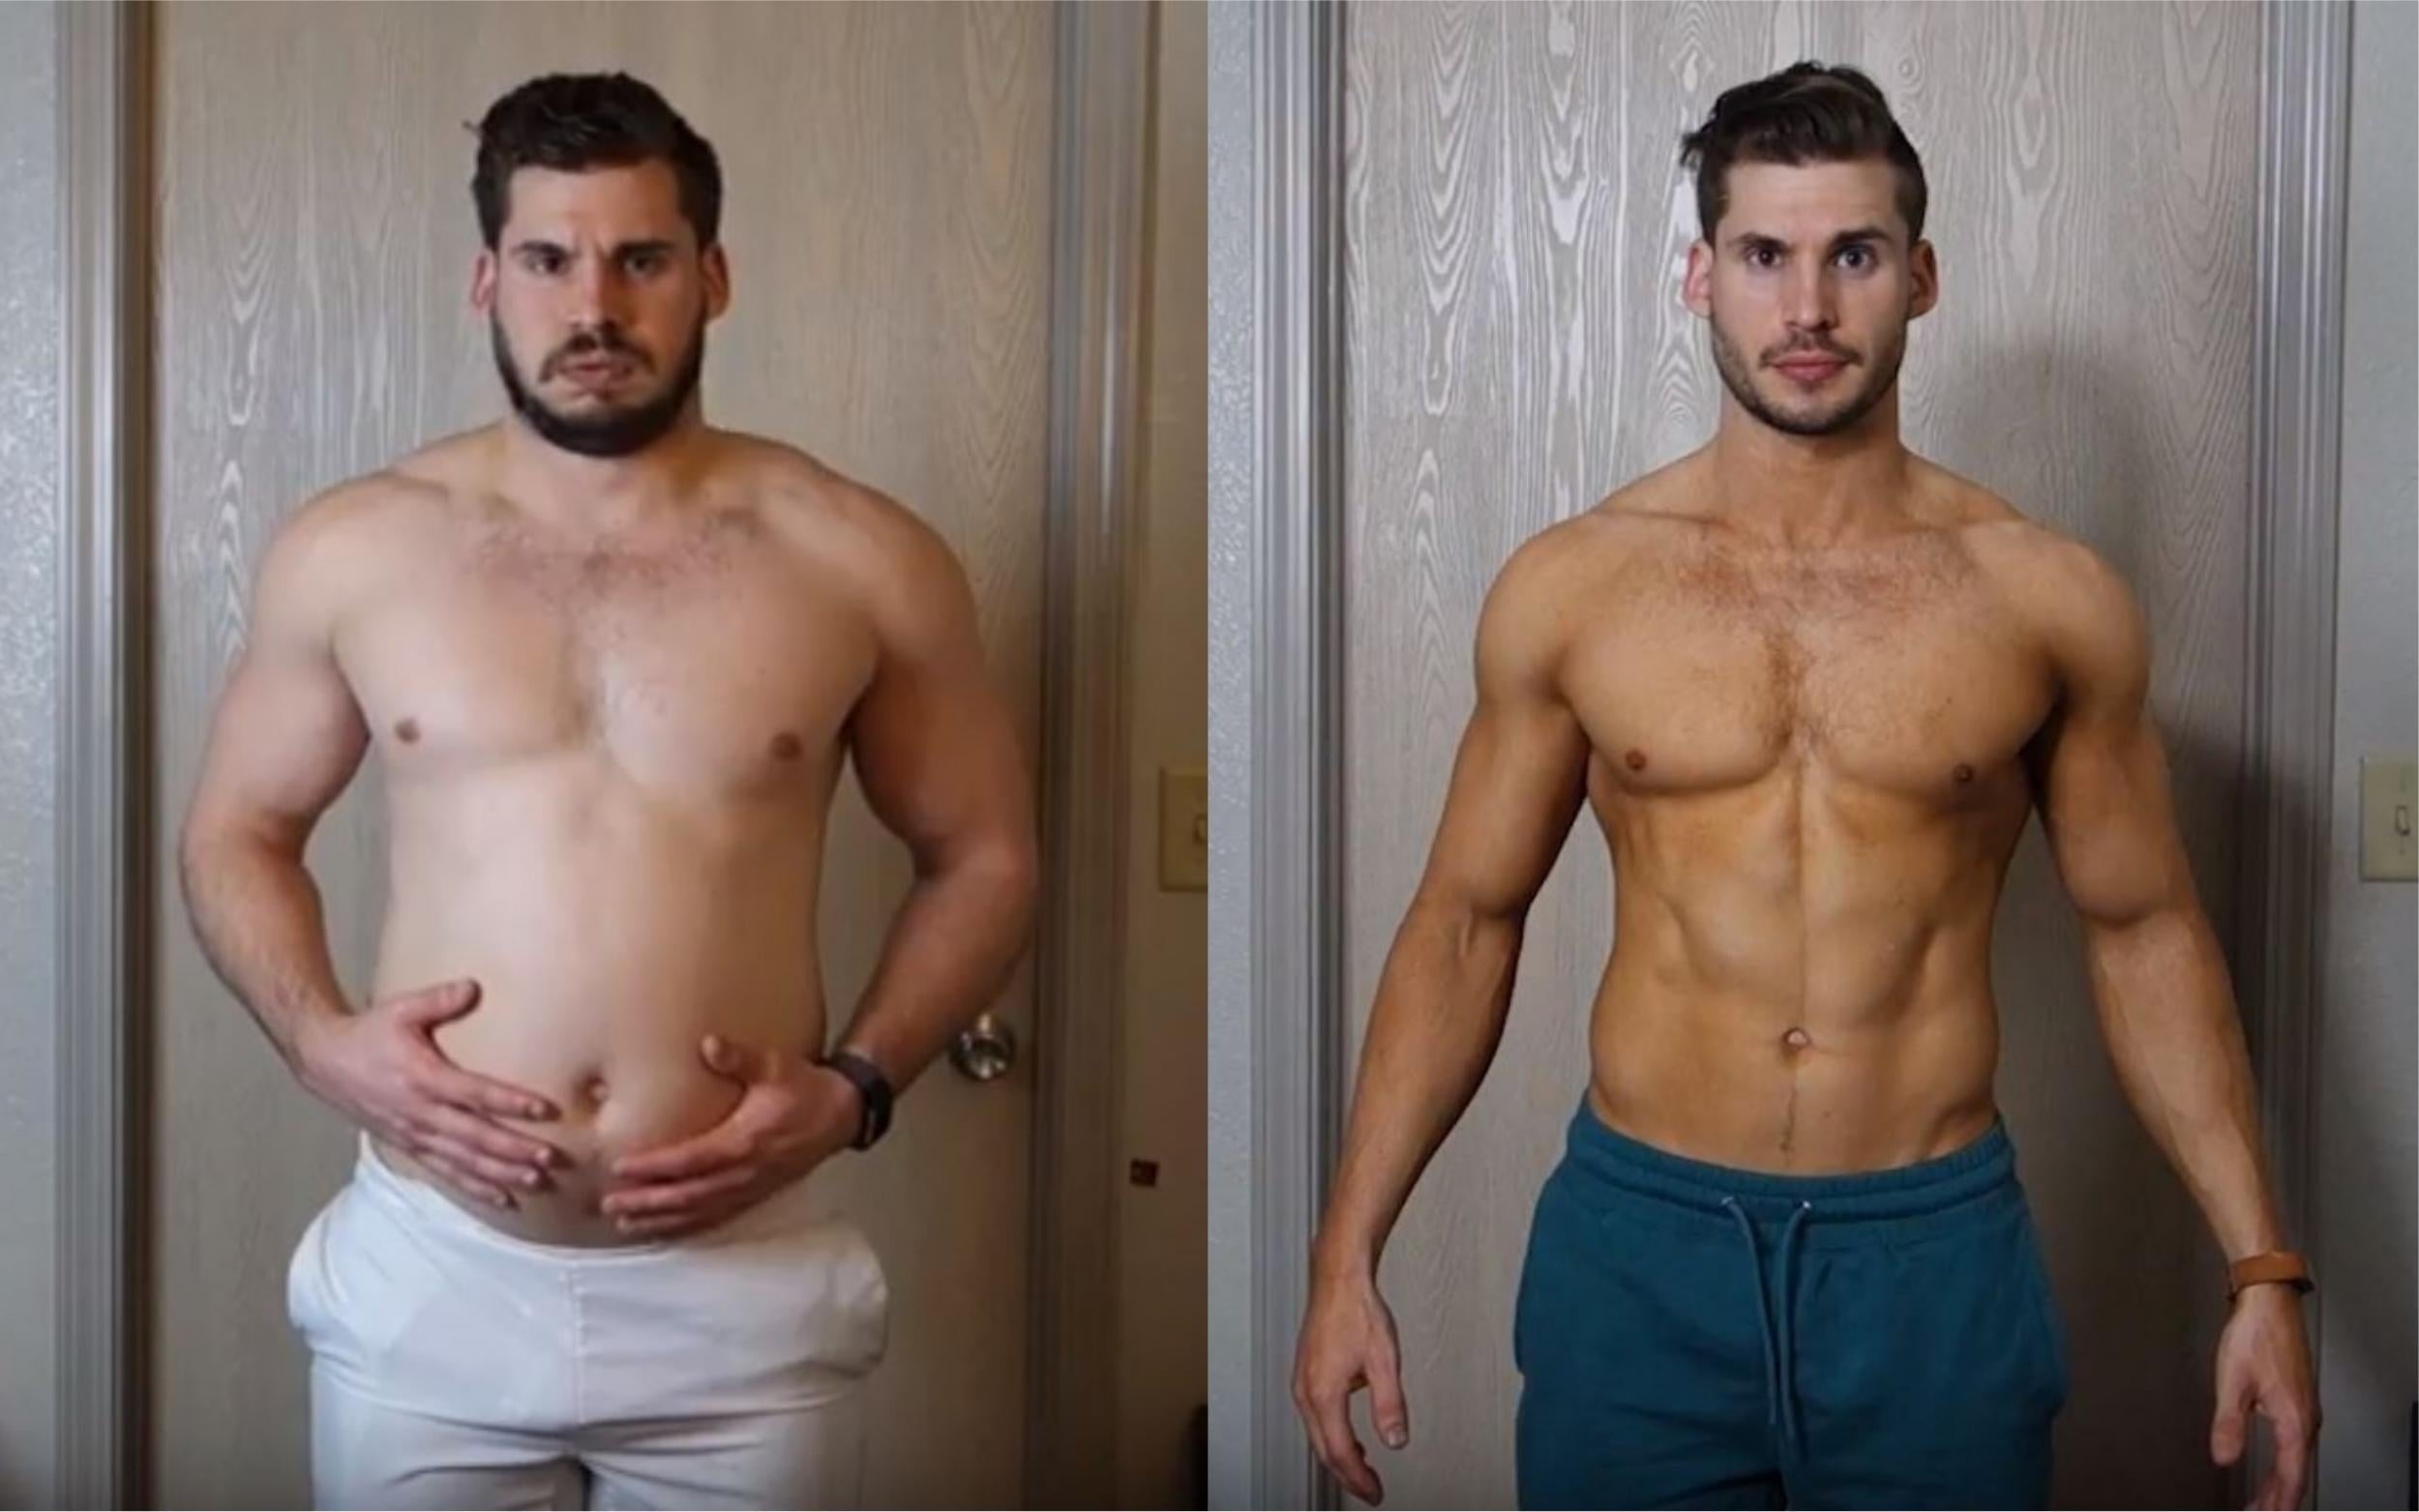
To craft a compelling story, consider using narrative structures like nested loops, where several stories interweave, enhancing engagement and emphasizing the main message. Chronological storytelling, such as time-lapse, effectively condenses lengthy periods into short, impactful moments, making complex concepts more digestible. Interactive storytelling further elevates engagement by allowing viewers to influence the outcome, fostering a deeper connection. For instance, a fitness brand might use time-lapse to showcase a character’s progress over weeks in a minute-long video, telling the story succinctly without extensive explanations.

Incorporating Emotional Elements to Enhance Viewer Engagement
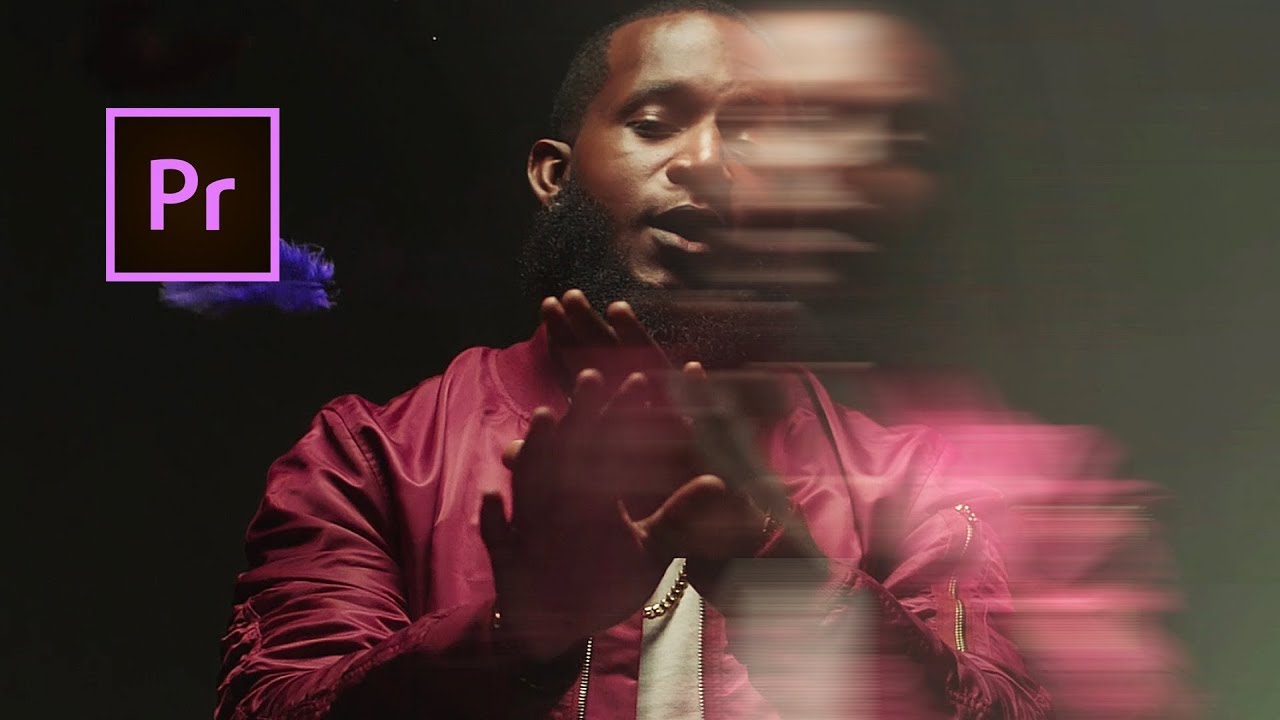
Incorporate emotional elements by utilizing techniques like slow motion to add intensity and drama to pivotal moments, making them memorable. Visual effects (VFX) can create extraordinary scenes that evoke strong emotions, enhancing the story's visual appeal. Interactive storytelling also increases emotional engagement by making viewers feel part of the experience. For example, a slow-motion sequence in a sports video can highlight every detail of an athlete’s effort, intensifying the emotional response.
Tips for Selecting Images that Support Your Narrative
When selecting images, choose those that visually represent key moments, reinforcing the narrative and aiding viewer comprehension. Opt for images that showcase transformation or change, such as before-and-after shots or time-lapse sequences, to visually communicate development. Additionally, select images that invite interaction or complement interactive storytelling elements, making the story more immersive. A skincare product campaign might use before-and-after images in a time-lapse format to visually demonstrate product effectiveness over time.
Optimizing Your Video with Pictures for SEO
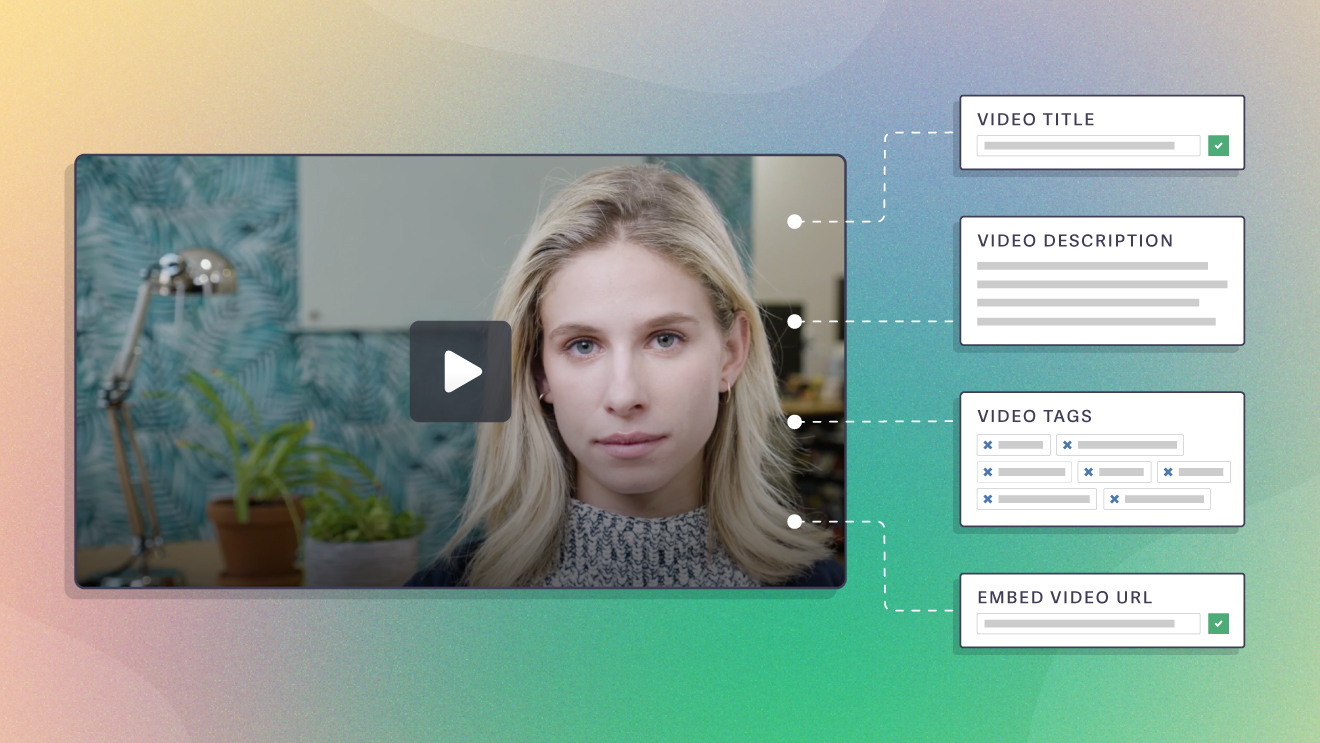
Importance of Keywords and Metadata in Video SEO
Keywords and metadata are crucial for video SEO as they form the backbone of discoverability. Conduct thorough keyword research to identify high-traffic keywords relevant to your video. Integrate these keywords naturally into your video’s titles, descriptions, and tags. This not only informs search engines about your content but also enhances its visibility. Ensure your metadata is keyword-rich and descriptive, clearly communicating the video’s content to viewers and search engines alike. A detailed description (200-300 words) provides context and should include calls-to-action to engage viewers.

How to Write Effective Titles and Descriptions for Your Video
Creating effective titles and descriptions is a vital aspect of video optimization. Titles should be concise, ideally under 60 characters, and include target keywords to ensure full visibility in search results. Descriptions should offer a comprehensive overview of the video content, incorporating keywords naturally. The first 150 characters are critical as they appear in search results, so make them compelling. Longer descriptions help search engines better understand the content, boosting SEO. For example, a fitness video titled "30-Minute Full Body Workout for Beginners" with a detailed description of the exercises and benefits can significantly enhance ranking.

Strategies for Using Tags and Categories to Improve Discoverability
Tags and categories are strategic tools for improving video discoverability. Tags categorize your content, associating it with relevant topics and keywords, which enhances search visibility. Use relevant tags that reflect your video's content and related keywords. Categories help organize videos under broader topics, aiding platforms in recommending your video to the right audience. For instance, a travel vlog about Paris might use tags like "Paris travel" and be categorized under "Travel & Events" to reach its intended audience effectively.
FAQ Section
What are the best free tools for making videos with pictures?
Some of the top free tools for creating videos from pictures include iMovie, Windows Movie Maker, Canva, and Adobe Express. These platforms offer user-friendly interfaces that make it easy to import photos and perform basic editing. They support adding music, text, and transitions to enhance your video. For instance, using Canva, you can upload your pictures, arrange them on a timeline, add music, and export a polished video without any cost. As of 2025, many of these tools have integrated AI features to automate editing and improve video quality.
How can I add music to a video made from photos?
Adding music to a photo video is straightforward with most video editing tools. You can import audio files and place them on an audio track within the video timeline. Choose background music that fits the mood of your video, adjust the volume levels, and synchronize the music with photo transitions. Many tools offer built-in royalty-free music libraries, making it easier to add music legally. For example, in iMovie, after importing your photos, you can drag an audio file into the timeline below your photos to add background music.
What are some creative transitions I can use in my photo video?
Creative transitions can significantly enhance your photo video. Options include fades, wipes, slides, zooms, and 3D effects. Smooth crossfades between photos can create a professional look, while more dynamic transitions like page curls or spins add visual interest but should be used sparingly to avoid distraction. Recent updates in video software have introduced AI-powered transitions that automatically match the style and pace of your video. Applying a fade transition between each photo creates a smooth and polished viewing experience.
How do I make a video with pictures look more professional?
To achieve a professional look in your photo video, use high-quality photos and maintain consistent aspect ratios. Incorporate smooth transitions and avoid overusing flashy effects. Add background music that complements the mood and pace of the video. Text overlays or captions can provide context or storytelling elements. Adjust brightness, contrast, and color grading for a cohesive look. Consistency in visuals and sound quality is key, as advised by creative director Anna Lee.

Can I use live photos to create more engaging videos?
Yes, live photos, which combine a still image with a short video clip, can add motion and depth to your videos. Many video editors support importing live photos, allowing you to extract or use the motion portion in your video. This approach makes your video more dynamic and captivating compared to static images. On iOS devices, you can convert live photos into short video clips and include them in your video timeline for enhanced engagement.
Conclusion
Diving into video creation with pictures has never been so simple, thanks to the wide array of tools at your fingertips today. Are you using Canva, Animoto, AI Studios by Deepbrain AI, or Descript? Each one brings something unique to the table, catering to different user needs and expertise levels. AI Studios shines with its user-friendly interface and powerful editing features, making it a top pick for both beginners and seasoned creators alike.
Imagine crafting a video as easily as piecing together a puzzle. By following the outlined steps—from signing up to adding music and transitions—you'll have a professional-looking video in no time. Want your video to tell a story? Enhance its power by weaving in compelling narratives and emotional elements. And to reach a wider audience, optimize it for SEO with relevant keywords, effective titles, and strategic tags.
As you embark on your video-making journey, remember that creativity and attention to detail are your best friends. Ready to turn your pictures into an engaging video? Jump into the process and let your creativity shine!